Showing posts with label snacks. Show all posts

Friday, March 27, 2015

"OH SHIT KIT" The perfect gift to someone with a hangover...

Do you know someone who is about to turn 21?!
Or anyone that is about to have a celebration night, where there will be drinking involved?! 
Then this is the easiest, cheapest, most perfect DIY gift bag for you to make!

My cousin is turned 21 today! 
We are all going to dinner tonight, and out afterwards. 
I put together this little gift bag from a group of us, to help her through the following day.

The bag reads:

"OH SHIT KIT"
The day after your 21st birthday you may be a little hungover.....
So we put together this kit to help you get sober.
Some Aleve, Gatorade, and even a snack.
Don't worry girl we got your back!" 

I simply just typed up the message in word document, I played around with fonts & printed it! I then colored in some of the letters. Cut the paper down to size, and glued it to the bag before I put the items inside!


Inside the bag includes:
1 bottle of Aleve  tablets
1 box of granola bars
1 bag of popcorn (one of her favorite snacks)
1 bottle of Gatorade
1 package of chewy Tums
1 tube of chap-stick
1 pack of gum

And the fun part is, you can include all of that or none of that at all, and make up your own kit!
I have another cousin turning 21 early next year that is a male, and I will be making him one as well, but I know I am going to include different items, that he would prefer!

If you make one of these easy and cheap yet fun and reliable gift bags please share it in the comments below or #CVA on Instagram!

Sunday, November 2, 2014

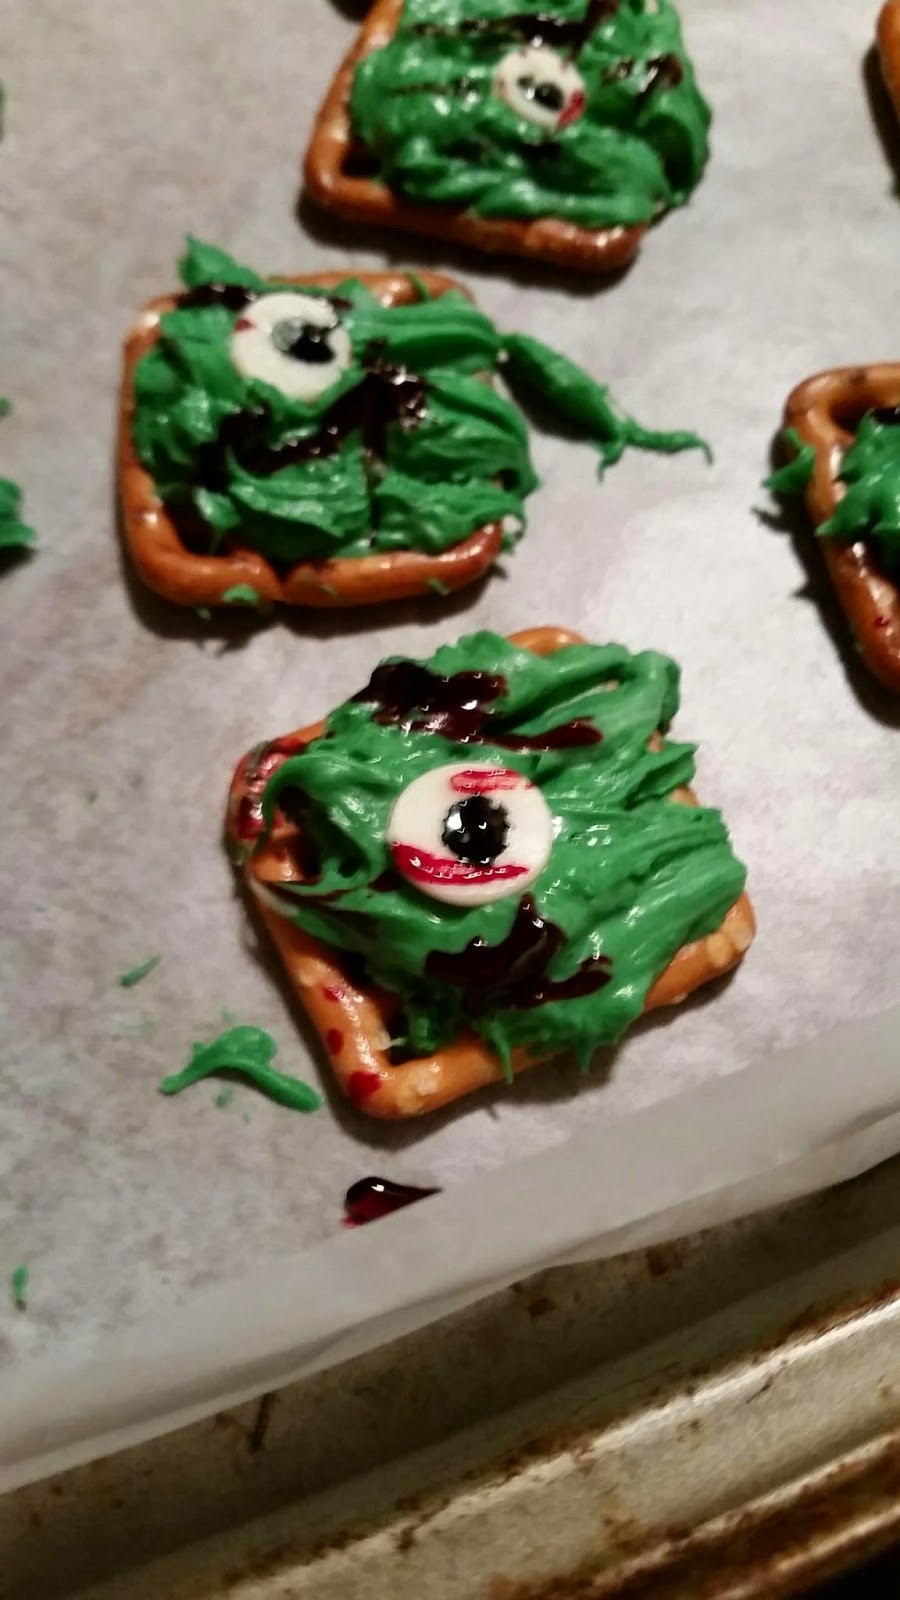
Zombie Bites! A snack for The Walking Dead fans!

Are you a fan of The Walking Dead?! 
Here is a fun snack to make for Sunday night!
ZOMBIE BITES!


You will need: 
White chocolate baking chips
Waffle Style pretzels
Sugar bones (I found my in the Halloween cake items)
Food coloring (I used red, black and green)
 

Other items I used:
mixing bowls
mixing utensils (I used a fork)
toothpicks
cookie sheets
wax paper
microwave

Step 1: Separate a bag of white chocolate baking chips into two bowls (make sure the bowls are microwave safe!)

 
Follow the directions on the chocolate chips package, for timing on how to melt the chocolate without burning it. 

Step 2: while the chocolate is melting away in the microwave, I laid out my pretzels on a cookie sheet covered with wax paper (I prefer it for an easier clean up!)
 
 Step 3: When the chocolate is melted, I added the food coloring. Green to one bowl and red to the other bowl. 


Step 4: I mixed the food coloring in very well, and kept adding more until the chocolate was my desired shades of green and red. When the chocolate was my desired colors, I used my fork to drop a blob onto each pretzel. I started with the green chocolate.


Step 6: before the green chocolate started to harden, I placed an un-melted white chocolate chip upside-down in random places of the green chocolate.  I then took red food coloring on a toothpick and dribbled red over the entire pretzel and chocolate to make it look like blood. I added a small dab of black food coloring to the center of the un-melted white chocolate chip to make it look like an eyeball. 


Step 7: Now onto the red melted chocolate! I did the same process as step 6 for the red as well, but I also used some candy sugar bones for some of them! I also didn't use any extra red food coloring to add blood to these ones, but you totally could if you wanted to! I did however, use a fork to rough up the chocolate a little more on these ones as the chocolate was starting to harden. I was going for more of a human look for these ones, compared to the green ones.


Step 8: place them in the fridge until it is serving time!

Step 9: Take them out of the fridge and enjoy them with other Walking Dead fans and friends!

p.s. these would also be a fun Halloween treat as well!! Heck, even for a scary movie night with friends or the family!

If you recreate these or even make your own version please remember to share a picture with me and your thoughts on them in the comments below! Or tag #CVA on Instagram! I could love to see your creations! 

Sunday, October 5, 2014

Anniversary Gift Basket & Boquet! (perfect gift for any man!) DIY

The hubby and I have been married for 2 years! 
Gosh, I can almost not believe it! It honestly feels like just yesterday I walked down that isle towards him. 

Well this year, we decided to keep it low key, and just spend the day together as a family. We actually went to a local museum and spent the entire day there just the two of us! It was perfect!

Anyways... of course I can't not make anything for him, so I put together this MAN BASKET for him. 

I included some of his favorite things, such as:
 Arizona Sweet Tea
Hunting items (face cover, vest and scent a way items)
Candy
Slippers
Slim Jim


I wrote out how long we have been married for, in years, months, weeks and days. I attached it to a basket from the Dollar Tree with twist ties. 
It was simple and he loved it because it was from the heart and full of some of his favorite things!

I also made him a Marriage Doesn't Suck bouquet! Because we are MINT TO BE! Corny but so cute, right?! ☺♥

His most favorite suckers around this time of the year are the caramel apple suckers. So I bought a huge bag of them and a piece of floral foam from the Dollar Tree. I also bought a giant bag of Wint-O-Green Life Savers, and Andes mints (more favorites of his) and used an old giant pickle jar that I had washed an put aside for a random DIY. 

 
I stuck the suckers into the floral foam that I duct taped to the lid of the pickle jar. I fanned them out so look somewhat like a bouquet. I then took the mints (both kinds) and mixed them up inside of the jar. I placed the lid on and taped on my homemade signs.
 
I wrote out 
"TO A MARRIAGE THAT DOESN'T SUCK!" 
and 
"BECAUSE WE ARE MINT TO BE!"


I had these waiting for my amazing husband this morning when he woke up, and he loves them! Not to mention I love them too because I also get to snack on them! hehe

I know that some men can be hard to get gifts for, or to make things for. This is perfect because you can fill it with their favorite items and use their favorite mints and candies! It was fairly cheap and very easy to make!

Please post pictures of your creations in the comments below if you make this. I would love to see them! You can also tag #CVA on Instagram!

Now I am going to spend the rest of the evening with my hubby ♥