Showing posts with label party. Show all posts

Saturday, April 25, 2015

Flower Pens - DIY

With the baby shower coming up soon, I am just finishing up some last final touches to make it a fun and girly shower. 

Here are the supplies you will need:

Pens (I used 5 I had around the house - 2 black and 3 purple)
hot glue gun + glue sticks
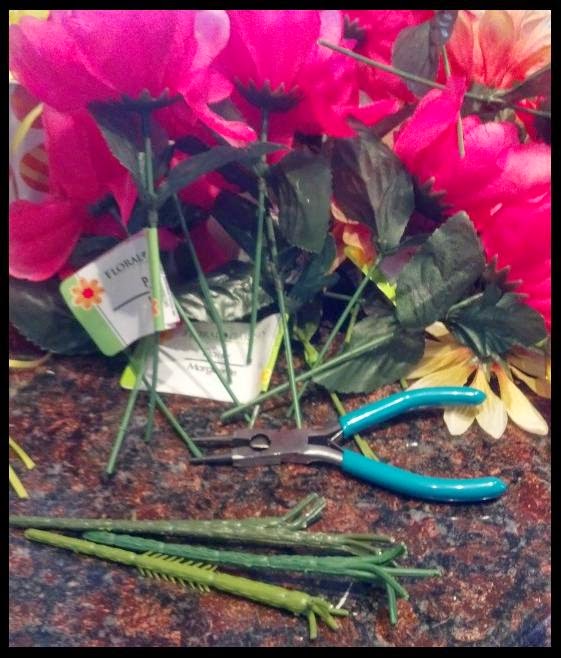
fake flowers (I got 1 bunch [5 flowers] from the Dollar Tree)
floral tape (also from Dollar Tree)
ribbon ( I pictured green here, but I ended up using pink [from Dollar Tree])
scissors


I started off by pulling off the flowers from their stems. I also pulled off the leaves, I was planning on using them but ended up just throwing them away. 
 

I threw away the steps and leaves. I then flipped the flowers over and used my scissors to cut of what was left of the stem.


I took the pens and floral tape and wrapped two layers around the pen. The floral tape is sticky, but not very sticky so I did seal the ends with a small dot of hot glue.
 
When the pens were all wrapped up in the floral tape, I flipped the flowers over, put a small amount of hot glue on the end of the pen and held it in place on the bottom of the flower until the glue was dry.


I added a pink bow (I just tied a piece of pink ribbon around the base of the flower and cut off the extra ribbon scrap to make the bow the size I wanted.)

Here are the final products. I think they are adorable!
They were cheap and did not take long to make at all.

 
These would be perfect for a shower - teacher gift - party - or just a cute addition to your desk at work. They look gorgeous in a small vase on the table, and I am excited to display them and use them at the baby shower.

If you make a version of these yourself, please share a picture of them in the comments below, or tag them on Instagram using #CreatingVirginiaAnne

I would love to see your creations!

Friday, March 27, 2015

"OH SHIT KIT" The perfect gift to someone with a hangover...

Do you know someone who is about to turn 21?!
Or anyone that is about to have a celebration night, where there will be drinking involved?! 
Then this is the easiest, cheapest, most perfect DIY gift bag for you to make!

My cousin is turned 21 today! 
We are all going to dinner tonight, and out afterwards. 
I put together this little gift bag from a group of us, to help her through the following day.

The bag reads:

"OH SHIT KIT"
The day after your 21st birthday you may be a little hungover.....
So we put together this kit to help you get sober.
Some Aleve, Gatorade, and even a snack.
Don't worry girl we got your back!" 

I simply just typed up the message in word document, I played around with fonts & printed it! I then colored in some of the letters. Cut the paper down to size, and glued it to the bag before I put the items inside!


Inside the bag includes:
1 bottle of Aleve  tablets
1 box of granola bars
1 bag of popcorn (one of her favorite snacks)
1 bottle of Gatorade
1 package of chewy Tums
1 tube of chap-stick
1 pack of gum

And the fun part is, you can include all of that or none of that at all, and make up your own kit!
I have another cousin turning 21 early next year that is a male, and I will be making him one as well, but I know I am going to include different items, that he would prefer!

If you make one of these easy and cheap yet fun and reliable gift bags please share it in the comments below or #CVA on Instagram!

Wednesday, December 24, 2014

EASY & CHEAP Pooping Reindeer Ugly Christmas Sweaters - DIY

Every year for Christmas my brothers and our significant others have a lotto party night, where we buy scratch off tickets instead of buy each other  presents. This year we decided to make it an UGLY SWEATER PARTY as well! EEkkk! As soon as we decided that I was overly excited to make a fun set of sweaters for the hubby and I to wear!

Things you need:
Sweaters
felt (colors listed below)
tulle
present bows
hot glue gun or fabric glue
scissors
marker to trace with
 
I started off by buying different colors of felt.
The colors I used are:
tan
cream
red
black
white

You need the most of the tan for the body of the deer,
You also need a good chunk of cream felt to use for the antlers.

I laid out the felt and drew on my reindeer.
I then cut it out and pieced him together.

I traced the hubby's hands on the tan, then my hands on the cream felt, so that the cream antlers were smaller than the tan antlers.

I also cut out a red oval for the reindeer nose!

 
I then laid out our two white sweaters that I bought for $5 each at WalMart.
I measured the height difference between my hubby and I, so that when we stood next to one another our reindeer matched up.

I plugged in my hot glue gun and let it heat up!

Then I got to gluing!


For the eyes, I cut out white felt and black rectangles to make the pupils.
I then used some black felt for the reindeer feet, and I took white tulle and bunched it up along the bottom of the sweaters, under the reindeer feet, to make it look like snow. I used hot glue for all of it and it help on very well!

The next step is applying the present bows!
I used 8 bows total.
I glued two bows falling from the reindeer's rear end.
and then I piled on the remaining 6 bows just above the tulle (which is acting as the snow)
The picture below shows that!


Our sweaters were a HUGE hit at the party! and people were even asking us if they could borow them! Which of course they can!

I paired my sweater with my long Santa hat, my red leggings, my stripped Christmas stockings that go above the knee, and my reindeer slippers that I absolutely adore!
The only downside is, I didn't want to take the chances to put it in the washing machine.. so I hand washed them, just to be safe.  

If you make your own version of this Ugly Christmas Sweater be sure to share it in the comments below, or tag #CVA on Instagram! I would love to see your creations! Even if you don't make this version, if this post even inspired you to create your own Ugly Sweater please share it too!

Sunday, November 2, 2014

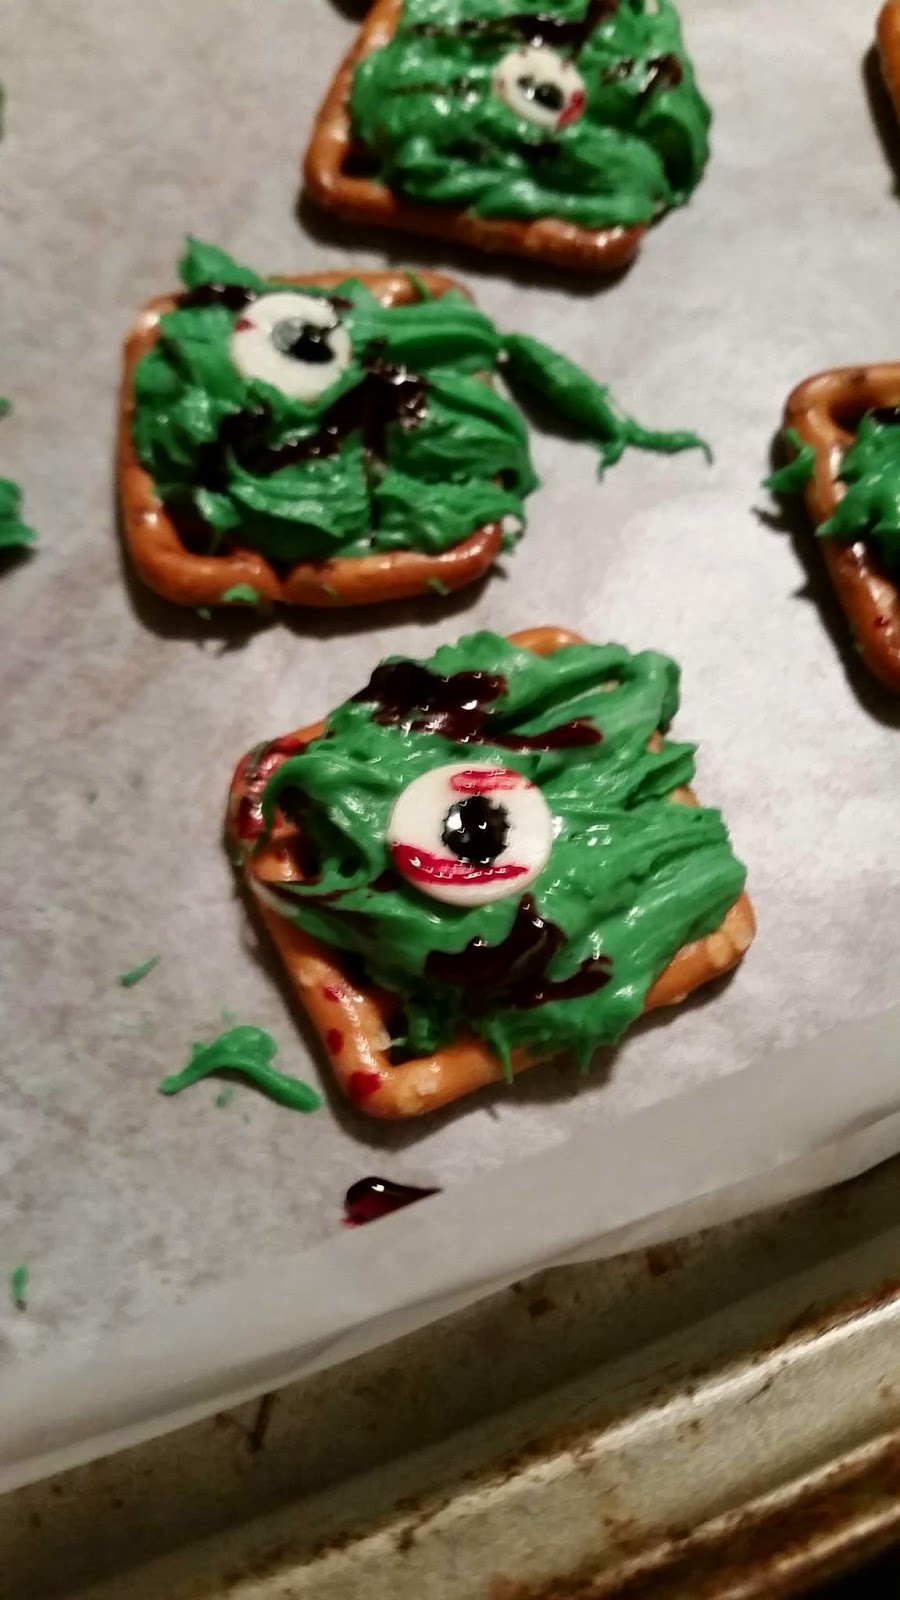
Zombie Bites! A snack for The Walking Dead fans!

Are you a fan of The Walking Dead?! 
Here is a fun snack to make for Sunday night!
ZOMBIE BITES!


You will need: 
White chocolate baking chips
Waffle Style pretzels
Sugar bones (I found my in the Halloween cake items)
Food coloring (I used red, black and green)
 

Other items I used:
mixing bowls
mixing utensils (I used a fork)
toothpicks
cookie sheets
wax paper
microwave

Step 1: Separate a bag of white chocolate baking chips into two bowls (make sure the bowls are microwave safe!)

 
Follow the directions on the chocolate chips package, for timing on how to melt the chocolate without burning it. 

Step 2: while the chocolate is melting away in the microwave, I laid out my pretzels on a cookie sheet covered with wax paper (I prefer it for an easier clean up!)
 
 Step 3: When the chocolate is melted, I added the food coloring. Green to one bowl and red to the other bowl. 


Step 4: I mixed the food coloring in very well, and kept adding more until the chocolate was my desired shades of green and red. When the chocolate was my desired colors, I used my fork to drop a blob onto each pretzel. I started with the green chocolate.


Step 6: before the green chocolate started to harden, I placed an un-melted white chocolate chip upside-down in random places of the green chocolate.  I then took red food coloring on a toothpick and dribbled red over the entire pretzel and chocolate to make it look like blood. I added a small dab of black food coloring to the center of the un-melted white chocolate chip to make it look like an eyeball. 


Step 7: Now onto the red melted chocolate! I did the same process as step 6 for the red as well, but I also used some candy sugar bones for some of them! I also didn't use any extra red food coloring to add blood to these ones, but you totally could if you wanted to! I did however, use a fork to rough up the chocolate a little more on these ones as the chocolate was starting to harden. I was going for more of a human look for these ones, compared to the green ones.


Step 8: place them in the fridge until it is serving time!

Step 9: Take them out of the fridge and enjoy them with other Walking Dead fans and friends!

p.s. these would also be a fun Halloween treat as well!! Heck, even for a scary movie night with friends or the family!

If you recreate these or even make your own version please remember to share a picture with me and your thoughts on them in the comments below! Or tag #CVA on Instagram! I could love to see your creations! 

Saturday, April 19, 2014

DIY Easter Center Pieces


I purchased everything for this project at the Dollar Tree!

The supplies I used are:
-Peeps & other marshmallow Easter animals
-Fake flowers (orange, white and pink) ((2 bundles of each))
-4 Easter themed buckets
-a pack of kabob skewers
-ribbon (stripes and egg print)
-clear party favor bags
-2 bags of jelly beans
-1 bag of yellow Easter grass
-4 round floral foams (2 packs)
oh! and scissors!

For a total of $24 
(to make 4 centerpieces!)


Step 1: Place a round floral foam in the bottom of each bucket.

Step 2: fill the rest of the bucket up to the rim with Easter grass.


Step 3: Sort the flowers into 4 piles to make sure they are all even and matching.


Step 4: Cut off the thick steps to the flowers (the ones that hold the bunches together)


Step 5: Start placing your flower in each bucket by pushing the stems into the floral foam. You may need to trim the stems down a little depending on the look you are going for. I trimmed all my stems way down because I wanted the flower to be low and look like they were almost pouring out of the buckets.


Step 6: After all your flowers are placed in, trim any Easter grass that is hanging out over the sides.

Step 7: Fluff the flowers and maybe reposition any that you want to.


Step 8: Step back and look at the beautiful centerpieces you just created.


           Now onto the next part of the center pieces.. the edible part!

   
You will need to use your peeps, jellybeans, bags and skewers now.


Step 1: Take a kabob skewer and start sliding on peeps, marshmallow animals and jellybeans. Until it is about 3/4 full. 

Helpful tip: I used Pam and sprayed each skewers first, it made it easier to slide on.

Here is a picture of some of the candy kabobs that I made...


Step 2: Carefully wrap each candy kabob in a clear party favor bag and use the twisty ties that came with the bags to secure it.

Step 3: Place each kabob into the floral foam between the flowers to add a fun little edible touch to your already beautiful center pieces.

I also ended up adding a few styrofoam Easter eggs on kabob sticks that I bought from the dollar tree as well. It was just a last minute touch sort of thing that jumped into my mind this morning. (the 1st picture in this post has them photographed in it)

Now your beautiful masterpieces are ready for display!
And a perk of using fake flowers... all I have to do next Easter is just replace the candy kabobs! SCORE!

Wednesday, April 16, 2014

DIY Pinata


We have a family tradition every Easter, where we have a pinata! We start with the youngest child, and each take about 3-4 swings at it. Well this year I really wanted to challenge myself and make the pinata. So that is just what I did!

Here is How I did it... 
For the base of your Pinata, You will need....


The picture below explains each step I took, but I will briefly explain them again right now. To start off I took my 2 sheets of cardboard and  drew out the shape of pinata I wanted. Since it was for our family Easter party, I chose a Bunny.  (step 1)

After I sketched out the bunny shape, I used a razor blade and cut out 2 identical copies of the bunny. (step 2)

My sheets of cardboard were a little too small for the size of bunny I wanted, so I used a 3rd sheet of cardboard to cut out the tips of the bunnies ears, then I just taped them to the bunny head. (steps 3 & 4)

I then took my 4th piece of cardboard and cut it into 5 long strips. I then used my hand and made them rounded to form the edges of my pinata. (steps 5 & 6) Sorry but I did not get a great picture of me taping on the edges, I tried my best to explain it. The edges are what makes your pinata a little more 3D. (like my step 6. picture below)


After the base of your pinata is completed. Now its onto the messy but fun part!
Paper Mache!

You will need flour, water and a mixing bowl. As well as old newspapers or an old phone book like I used.  

(click on the picture of the steps below to make it bigger, and to read each step)


I did one coat at a time, and let it dry for just about 24 hours before putting on the next coat. 
I ended up doing a total of 3 coats of paper mache on this pinata. And I think it was pretty strong. But next time I might do about 5 coats because we had some really strong kids hitting it this year. Even though it lasted pretty long and roughly through about 12 kids, I would like it to last a little bit longer next time.

After you do your desired amounts of paper mache, and they are completely dry, now its onto the really fun part.. decorating and completing your pinata.

For this part, you will need tissue paper, glue (I used modge podge) and scissors.


(CLICK ON THE PICTURES TO MAKE THEM BIGGER)


I also didn't get any picture of my layering the tissue paper on because my hands were covered in glue and I didn't want to touch my camera with gluey hands. I also ended up getting so caught up in this project that it left my mind. But again, I tried to explain it the best I could. I plan on making another pinata soon, my nephew wants one, so I am planning on video taping that process and uploading to my YouTube channel. and of course I will share that on here as well! hopefully getting it done next weekend!


For the finishing touch I made a blindfold out of a piece of black scrap fabric that I had laying around, and I used my sewing machine to sew on a cute Easter ribbon that I bought from the local dollar store. We made a new rule this year, that ages 5 and up had to wear a blindfold because last year that was no blindfold rule and it was way too easy to destroy!

UPDATE: (4-20-14) Here is a picture of my adorable nephew taking his turn. He had a huge smile on the entire time and he also liked it so much, that he asked me to make him on for just him. (That's my project for next weekend. ha!)


I really hope you enjoyed this short yet long tutorial; and I really hope it was helpful in walking you through a DIY Pinata.

If you make a pinata of your own, please share a picture, I would love to see it!

Look out for a video tutorial coming soon!